Cute Bunny Sugar Cookies are a beginner-friendly spring dessert with buttery flavor, soft centers, lightly crisp edges, and simple make-ahead appeal for Easter platters, bake sales, and family cookie decorating.

These cookies are the kind of treat that instantly make a dessert table feel more fun. They are playful without being fussy, and the bunny shape gives you something festive without needing complicated decorating skills.
What makes them especially nice for home baking is how approachable the dough is. You stir it together in one bowl for the wet ingredients and one for the dry, then shape the cookies with a simple head-and-ears method that feels easy once you do the first one.
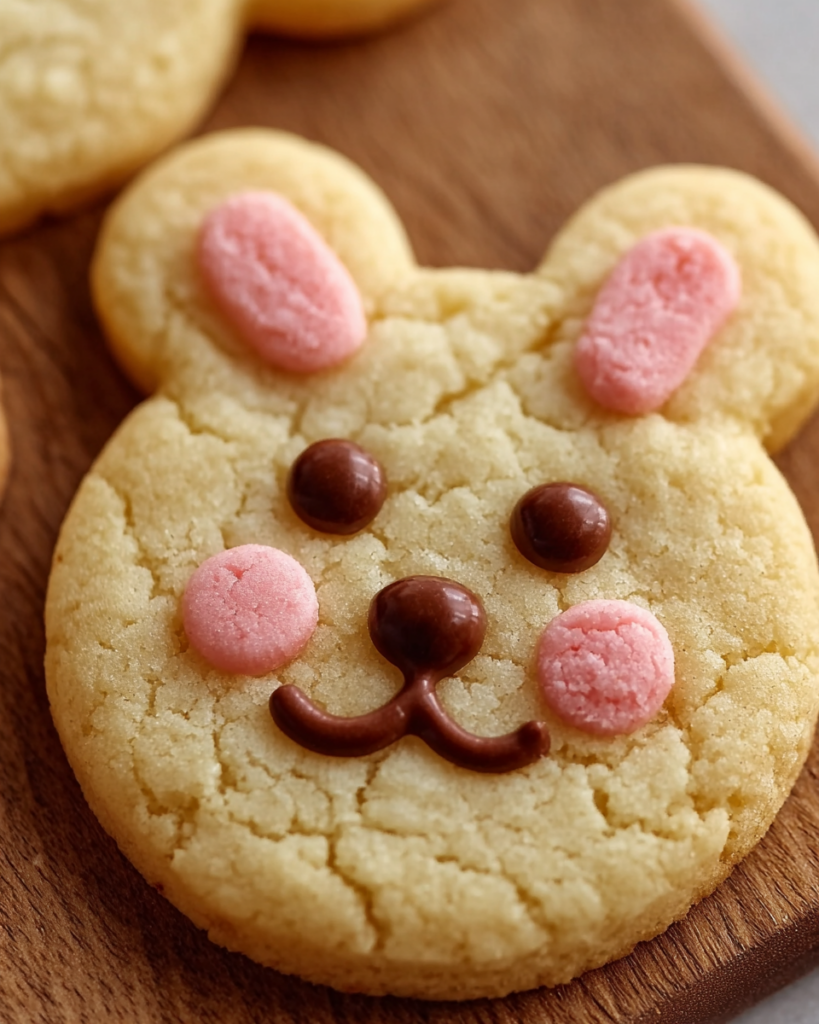
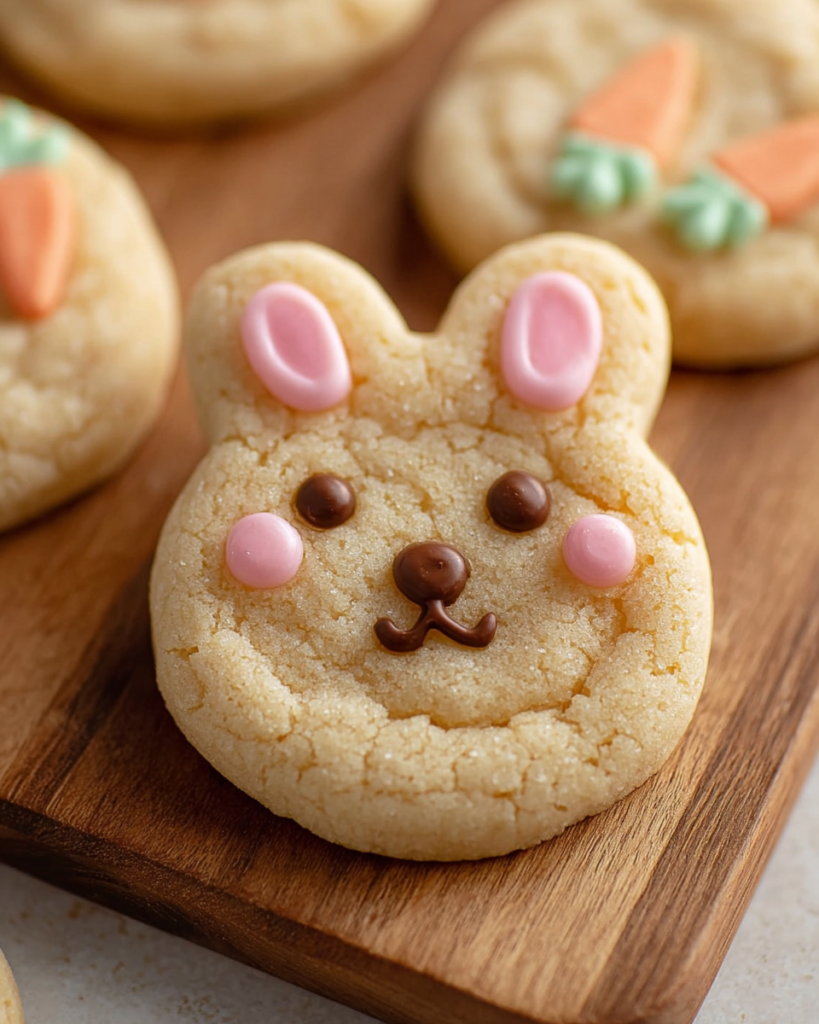
The final touch is what really brings them to life. A little melted chocolate for the face and a bit of tinted white chocolate for the ears turns a straightforward sugar cookie into something that looks thoughtful, cheerful, and ready for spring celebrations.
Cute Bunny Sugar Cookies Ingredients
Unsalted butter gives the cookies richness and helps create that tender, bakery-style texture since it is melted before mixing.
Egg binds the dough and adds structure so the bunny heads and ears hold together as they bake.
Vanilla extract rounds out the flavor and gives the cookies a classic sugar-cookie warmth.
Granulated sugar sweetens the dough and also coats the outside for a delicate sparkle and slight crunch.
Brown sugar adds a little moisture and helps the centers stay soft.
All-purpose flour provides the base of the dough and keeps the cookies sturdy enough for shaping.
Baking powder and baking soda work together to give the cookies just enough lift without making them puff too much.
Salt balances the sweetness and keeps the buttery flavor from tasting flat.
Easter-colored sprinkles add extra color and make some cookies look festive even before the chocolate details go on.
White chocolate is used for the pink inner ears and soft blush accents.
Pink or red oil-based food coloring tints the white chocolate without making it seize.
Milk or dark chocolate creates the bunny eyes and nose and gives a gentle contrast against the pale cookie.
Step-by-Step Cute Bunny Sugar Cookies
STEP 1: Start by whisking the dry ingredients together until they are evenly combined. In a separate larger bowl, stir the melted, cooled butter with both sugars until smooth, then mix in the egg and vanilla until the mixture looks glossy and well blended.
STEP 2: Add the dry mixture into the wet ingredients and stir just until a soft dough forms. At this point, you can shape the cookies right away for a softer bite, or chill the dough briefly if you want a slightly chewier texture and easier handling.
STEP 3: Heat the oven and line your baking trays. Set out a small bowl of granulated sugar for rolling and another dish of sprinkles if you want a mix of plain and decorated cookies.
STEP 4: For regular round cookies, scoop portions of dough, roll them in sugar, and place them well apart on the trays. For sprinkle-topped cookies, press the tops lightly into the sprinkles before arranging them on the baking sheet.
STEP 5: To make the bunny shape, form one larger ball for the head, then use two tiny pieces of dough rolled into short logs for the ears. Place the ears above the head with a bit of space between them so they stay distinct once the cookies spread in the oven.
STEP 6: Bake just until the edges are set and the tops no longer look raw. Pull them earlier for softer cookies or leave them a touch longer if you prefer a chewier edge with a hint of golden color.
STEP 7: Let the cookies cool on the trays briefly before moving them to a wire rack. Once completely cool, pipe on the facial details with melted dark or milk chocolate, then add tinted white chocolate to the ears and cheeks for that sweet bunny look.
Helpful Tips
- Keep the butter cooled before mixing so the dough stays balanced and does not turn greasy or overly loose.
- Make the ear pieces a little thicker than you think you need, because very thin ears can spread too much or lose their shape.
- Let the melted chocolate cool slightly before piping so the details stay neat instead of running.
Can I make the dough ahead of time?
Yes. You can mix the dough and refrigerate it for up to a day before shaping and baking. Let it sit for a few minutes at room temperature if it feels too firm to portion cleanly.
Why did my bunny ears spread together?
That usually happens when the ears are placed too close or shaped too thin. Leaving a little gap between them and using slightly chilled dough helps the bunny shape stay more defined during baking.
Do I have to use both white and dark chocolate?
No. Using both gives the cookies more contrast, but you can decorate them with just one type if that is what you have on hand. The dark chocolate is usually easiest for facial details, while white chocolate works nicely for the ears.
Can I decorate them with sprinkles instead of piping?
Yes. Sprinkles are a great option if you want a faster finish or are baking with kids. You can press them on before baking for color or attach a few after baking with melted chocolate.
Are these cookies soft or crisp?
They lean soft and tender in the center with lightly set edges. For an even softer batch, bake them on the lower end of the time range. For a slightly chewier finish, chill the dough first and bake until the edges turn faintly golden.
What to Serve with Cute Bunny Sugar Cookies
These cookies fit beautifully on a spring dessert board with fruit, pastel candies, and a few mini chocolate treats. They add a homemade touch without making the whole table feel heavy.
They are also lovely with tea, coffee, or a glass of cold milk when you want something simple for an afternoon gathering. Because the flavor is classic and not overly rich, they pair well with almost anything on a holiday spread.
For a fuller Easter dessert table, serve them alongside lemon bars, carrot cake, or coconut cupcakes. The bright, buttery cookie flavor works especially well with desserts that have citrus, vanilla, or chocolate notes.
How to Store & Reheat
Once the chocolate decorations are fully set, store the cookies in an airtight container at room temperature for about 3 days. Place parchment between layers if you want to protect the piped details.
For longer storage, refrigerate them for up to 1 week. Let them come back to room temperature before serving so the texture softens again and the butter flavor comes through more clearly.
You can also freeze the undecorated cookies for up to 2 months. Thaw them at room temperature, then decorate once they are fully dry and no longer cold. Reheating is not really necessary for this style of cookie, but a few minutes on the counter brings them back to their best texture.
Cute Bunny Sugar Cookies
Ingredients
For the dough:
- 1/2 cup unsalted butter melted and cooled to room temperature
- 1 egg
- 1 teaspoon vanilla extract
- 1/4 cup granulated sugar
- 1/4 cup packed brown sugar
- 1 1/2 cups all-purpose flour
- 1/2 teaspoon baking powder
- 1/2 teaspoon baking soda
- 1/2 teaspoon salt
For rolling and shaping:
- 4 tablespoons granulated sugar
- sprinkles in Easter-inspired colors
For decorating:
- 3 tablespoons white chocolate
- pink or red oil-based food coloring
- 1 tablespoon milk chocolate or dark chocolate
Instructions
- In a medium mixing bowl, whisk together the flour, baking powder, baking soda, and salt until evenly combined.
- In a larger bowl, stir the cooled melted butter with the granulated sugar and brown sugar using a silicone spatula until the mixture is smooth and well blended.
- Add the egg and vanilla extract to the butter mixture, then mix thoroughly until fully incorporated.
- Add the dry ingredient mixture to the wet ingredients and stir just until no streaks of flour remain.
- Continue directly to shaping for softer cookies. For a slightly chewier texture, cover the dough and refrigerate it for 30 minutes before proceeding.
- Preheat the oven to 325°F (163°C). Line two baking trays with parchment paper or silicone baking mats.
- Place the 4 tablespoons of granulated sugar in a small bowl or shallow plate for rolling. If using sprinkles, set those out on a separate plate or in another small bowl.
- For standard sugar cookies, scoop portions of dough measuring about 1 1/2 tablespoons each. Roll each portion in granulated sugar, then arrange them on the prepared trays, leaving 3 to 4 inches between each cookie.
- For sprinkle-coated cookies, scoop the dough in the same amount, press the tops into the sprinkles, and place them on the trays with the same spacing.
- To form bunny cookies, scoop approximately 1 1/2 tablespoons of dough and shape it into a ball. Roll it in granulated sugar and place it on the lined tray as the bunny’s head.
- For the ears, portion about 3/4 teaspoon of dough, divide it in half, and roll each half into a log about 1.25 inches long. Position the two pieces above the head to create ears, making sure they are placed so they do not spread into one another during baking.
- Arrange the bunny cookies with 3 to 4 inches of space between each one.
- Bake for 9 to 11 minutes. For softer cookies, remove them when the edges are set. For a chewier finish, bake until the edges become lightly golden.
- If using decorative sprinkles after baking, gently press them into the warm cookies immediately after they come out of the oven. They may also be attached later with melted chocolate.
- Allow the cookies to rest on the baking trays for 5 to 10 minutes, then transfer them to a wire rack and let them cool completely.
- Melt the milk or dark chocolate in a microwave-safe bowl, heating in 30-second intervals and stirring between each interval until smooth. Transfer it to a piping bag and use it to pipe the eyes and nose.
- In a separate bowl, melt the white chocolate and tint it with a small drop of pink or red oil-based food coloring. Transfer this mixture to a piping bag and pipe the inner ears and blush details.
- If either chocolate becomes too thick or lumpy, stir in neutral oil a teaspoon at a time until the texture becomes smooth enough for piping.
- Let the decorations set completely before serving.


